For sites with ‘Phoca Gallery’ installed:
Phoca Gallery lets you upload images and create galleries that you can display on your site. This is NOT the same as uploading an image to insert into an article. See inserting/editing images for more details on images in articles.
With Phoca Gallery, you can do several things. You can create a menu link that goes to a list of photo galleries, you can show a random image from a photo gallery in a module, or you can insert a mini-gallery or slideshow inside of an article. This article describes how to create categories, upload images, and create a menu item to access the gallery on the front end.
A category can be for a particular topic or event, and categories can be nested. So you might have a category for Hebrew School, and a subcategory for the 2012-2013 school year. Keep in mind that you may need a signed release in order to post pictures of congregants, especially of children. In some cases, the release may have been included in the Hebrew School registration form or other document that you have already obtained from congregants.
Creating a category:
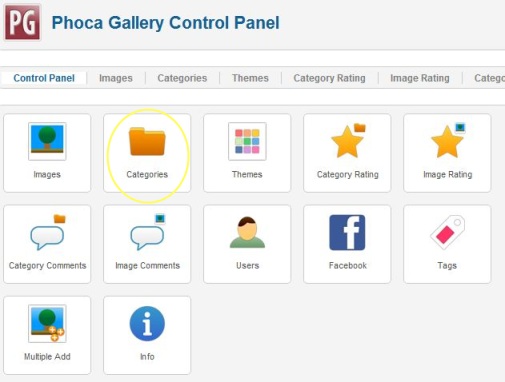
Go to Components, Phoca Gallery. You will now be at the Phoca Gallery Control Panel screen. Choose ‘categories.’

On the categories screen, click on ‘new’ in the upper right hand corner. The only item that is REQUIRED on this screen is the title. If this is a subcategory, be sure to choose the parent. If the images should only be available to users who are logged in, choose ‘registered’ for access rights. (Note: This is only applicable for sites that provide a login box for their users. If your site does not require users to login to access special content, your pictures will need to be available to everyone, and you should not choose an option for access rights.) At the bottom of the screen, there is an editing box where you can put a description of the category, if you choose.

When you are done, click ‘save and close’ on the upper right hand side of the screen. You will now see a list of the categories, including the one you just created. Make sure there is a check mark in a green circle for ‘published’ and ‘authorized’ – if either of these are red, instead, the images will not appear on the website.
Adding images to a category:
Go to Components, Phoca Gallery, and select ‘Images’ from the Phoca Gallery Control Panel. From the Images page, click ‘New’ on the upper right hand corner. There are only three required fields – Title, Category, and Filename. When you click on ‘Select Filename’ a pop up box will appear. At the top of the box, you will see the images that have already been uploaded. If you scroll down, you will see an option to upload an image.


When you click ‘Choose File’ you will be able to browse on your computer for the image. After choosing the image, click ‘Start Upload.’ Once the image is uploaded, you will see a message that Phoca Gallery is generating thumbnails. and then a message ‘File Uploaded’ at the top of the image box. You must then click on the image that you just uploaded, to select it. This will bring you back to the New Image page, but the filename will now show in the Filename field. You do not need to fill out any other fields. Creating a description of the image in the editing box at the bottom of the page is optional. When you are done, click ‘save and close’ if you are done or ‘save and new’ if you want to repeat the process with a new image.
NOTE: There are also methods for uploading multiple images at once into a category. If you are interested in doing so, please email us for more information.
Creating a Menu Item
Once you have several images in a category, you may want to create a menu link to your photo gallery. Go to ‘Menus’ ‘Main Menu’ (or other menu that you want to add to). Click ‘New’ on the upper right hand side to create a new menu item. For ‘Menu Item Type,’ click ‘select’ and choose ‘List of Categories (Categories View)’ under Phoca Gallery. You must enter a menu title. In most cases, a photo gallery will not be a top level menu item, so you will want to choose the Parent Item, such as About Us. Click ‘Save and close’ and then go to the front end and refresh to see the new menu item appear.
If you want the menu link to go directly to the images in a category and not a list of all the categories, choose ‘List of Images (Category View)’ instead of List of Categories, in the menu item type, and make sure to select the category on the right hand side of the screen.
Remember to resize your images on your computer before uploading them – images should be under 100kb each, the smaller the file size the better!